Crypnut help
This page will help you to familiarize with Crypnut tools. At the end, you'll be able to create keys, receive crypnuts, merge a transfer into your wallet & send crypnuts. Nothing's easier...
How to create keys
To create a private key & a public key (your Crypnut address) is the first step. Either you can install Crypnut tools the hard way on a local server, or you can load the page online from your most trusted server (best is to use it offline & in private browsing mode) by clicking this link.
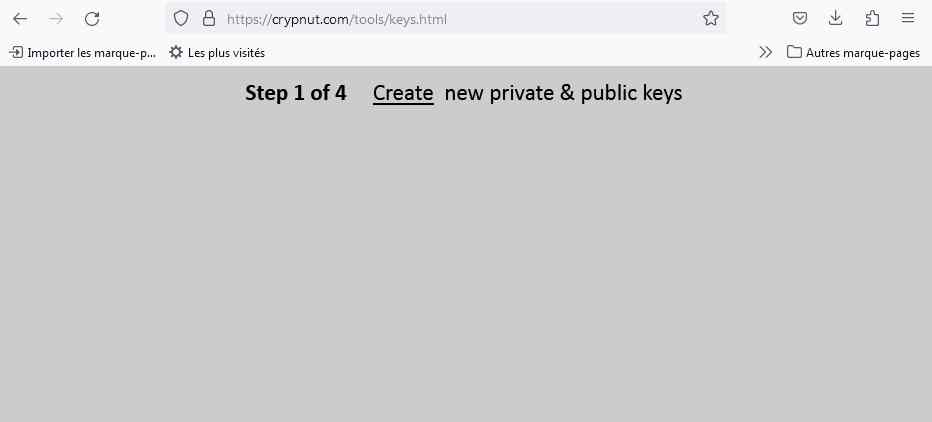
You only have to follow the steps by clicking "Create", "Sign", "Verify" and you're done by reaching next screen. Final step is to download both files (private key & public key).
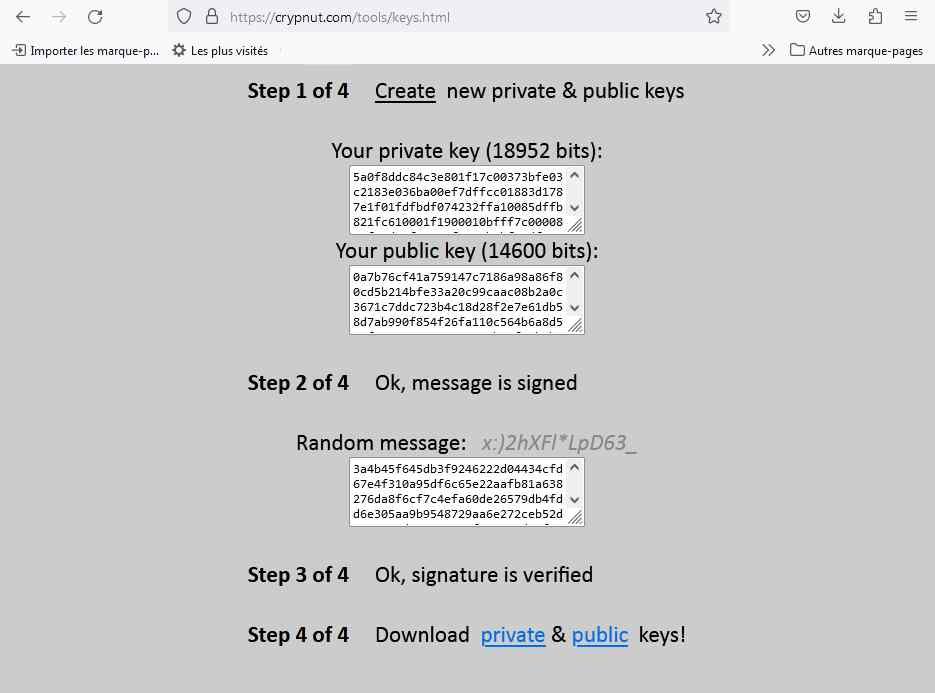
Please ensure to encrypt your private key that you should never share with anyone. On the contrary, you can share your public key, that is your Crypnut address.
How to receive & register crypnuts
To receive crypnuts, you need to get a transfer file from the sender. Then, either the sender or the receiver can initiate the process to register crypnuts by submitting the transfer file (created by the sender) on a Crypnut server, most often on its index page.
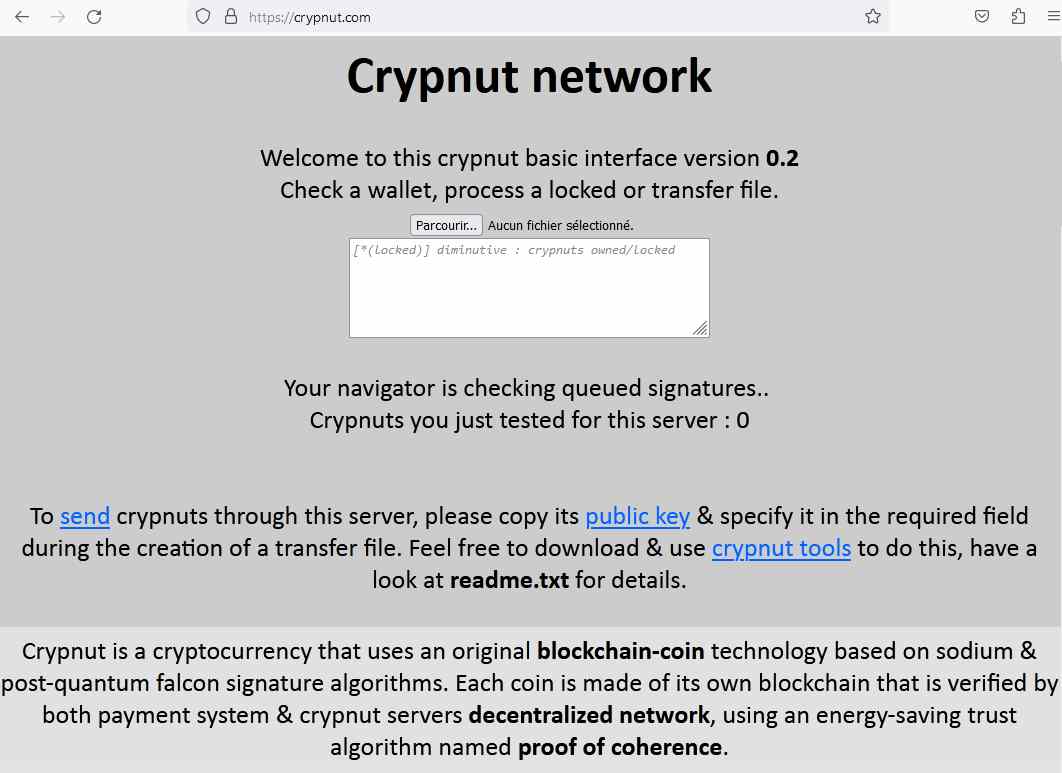
After you selected a lock, transfer or wallet file (by clicking "Browse", or "Parcourir" in french), all crypnuts are read & verified both by your navigator (that is the payment system) and by the server.
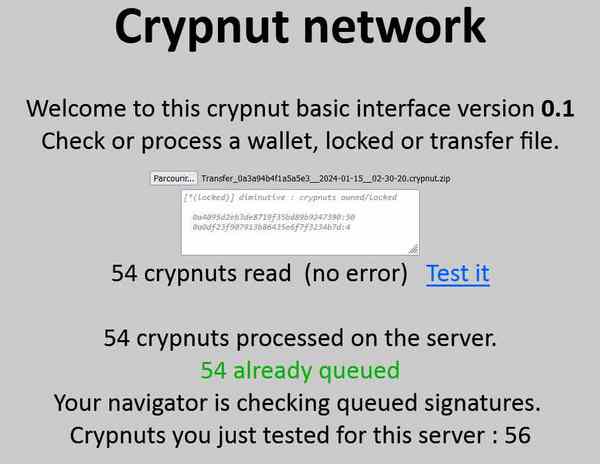
When the 54 crypnuts transfer is submitted for the first time, at the end of the process you should read "54 still queued". If it is submitted again before it is validated, you may read "54 already queued", or "54 still queued" according to the process step.
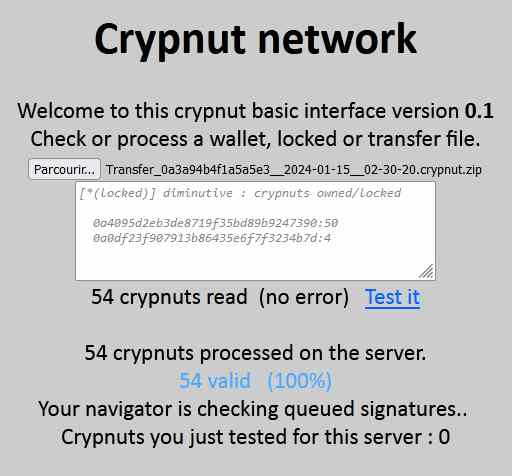
Here you can read in blue "54 valid (100%)", meaning that this transfer file has been fully validated. You can now merge it to receiver's wallet. Note that you can read in the text area the diminutives of the receiver (who received 50 crypnuts) & the server (that received the fee, here 4 crypnuts).
How to merge a transfer into a wallet
"Merge" tool can be loaded from your most trusted server as well (it can be used while remaining online as private key is not used here) by clicking this link. Before to update your wallet, you should ensure that the transfer you received has been fully validated by the server.
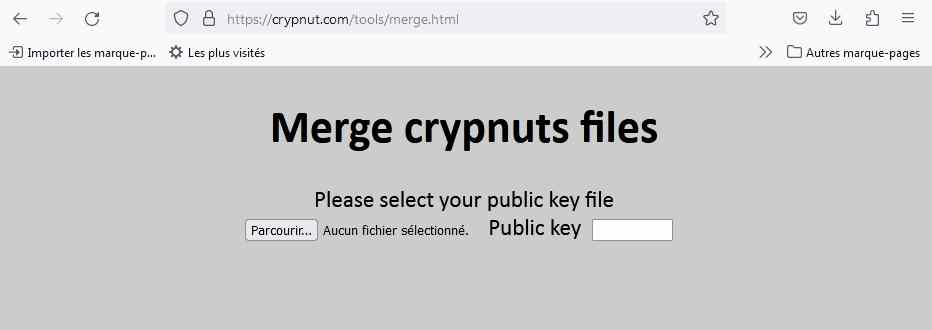
Just click "Browse" (or "Parcourir" in french) to select your public key file, or copy it in the text field on the right. If it appeared from a previous use, just click the text field once.
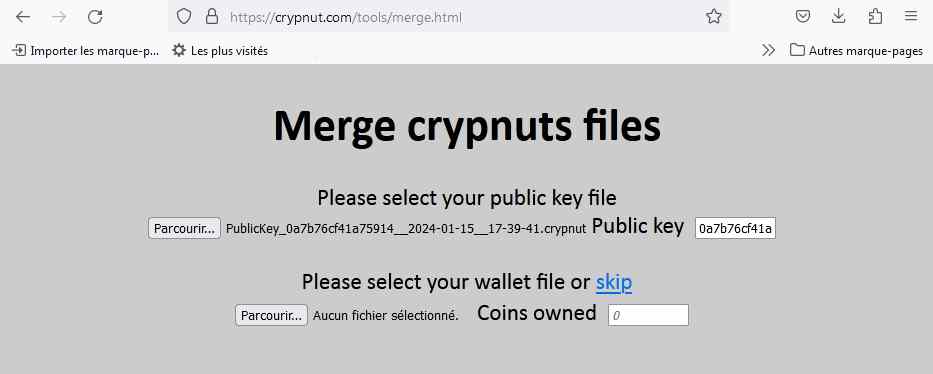
If you do not have a wallet yet for this public key, click "skip", otherwise click "Browse" then select your most recent wallet file.
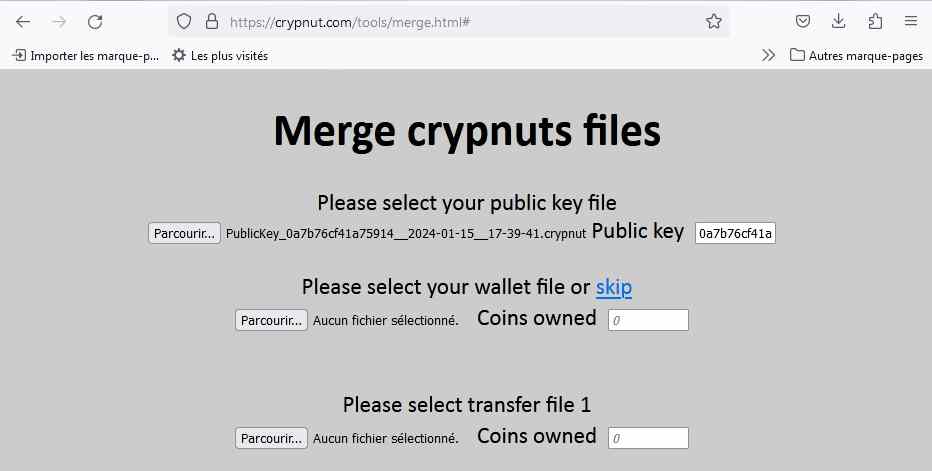
Now you can merge several transfer files to this wallet. Click "Browse" to select the first received transfer file you want to add.
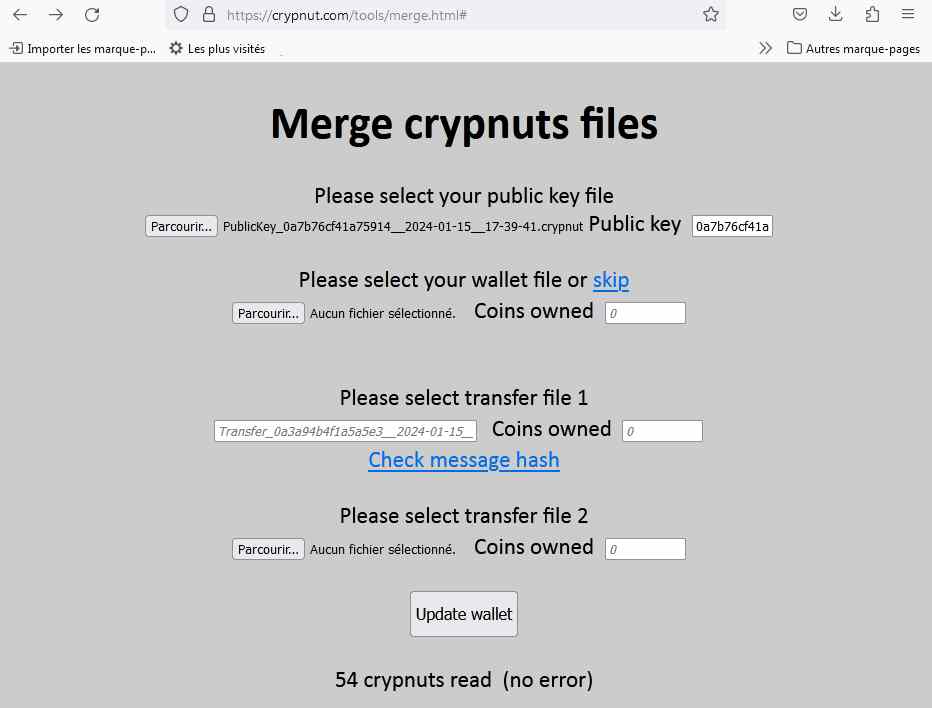
In this example, 54 crypnuts have been read but 0 is owned by my public key, meaning that this first transfer wasn't sent to this key. In all cases, after the transfer file has been read, you can either check the message hash to authentificate the sender if needed, add a second transfer file, or update your wallet (then you can download it).
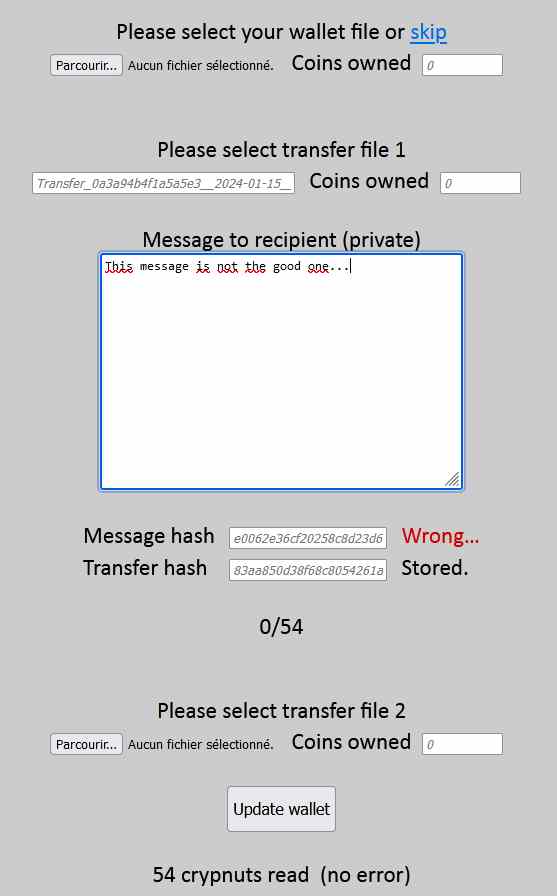
In this example, if you paste what is not the original message written by the sender, you'll see that the message hash will differ from the transfer hash. You also see that 0 crypnut out of 54 belong to your public key, meaning there's definitely a problem with this file (50/54 would have been correct as 4 crypnuts represent the server fee).
How to send crypnuts
"Send" tool can be loaded from your most trusted server as well (best is to use it offline & in private browsing mode as it requires your private key) by clicking this link.
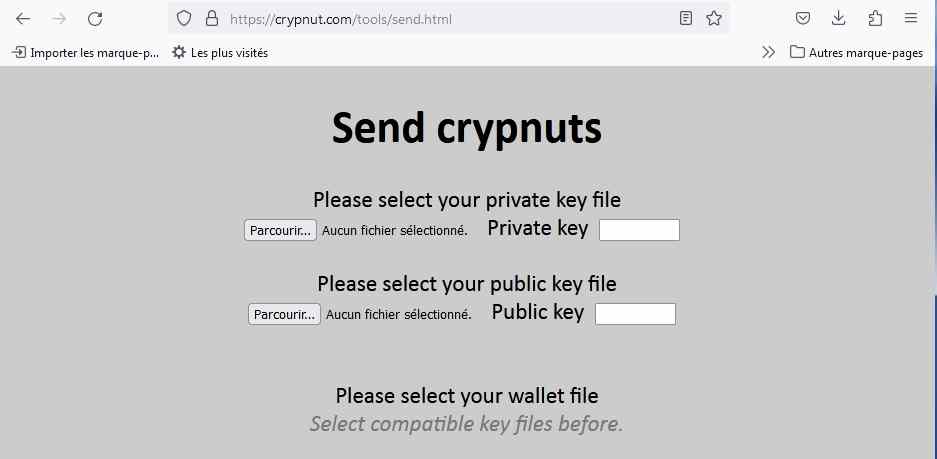
Click "Browse" to select your private key file (decrypted if you encrypted it), then select your public key file. If they are compatible, then you can select a wallet file.
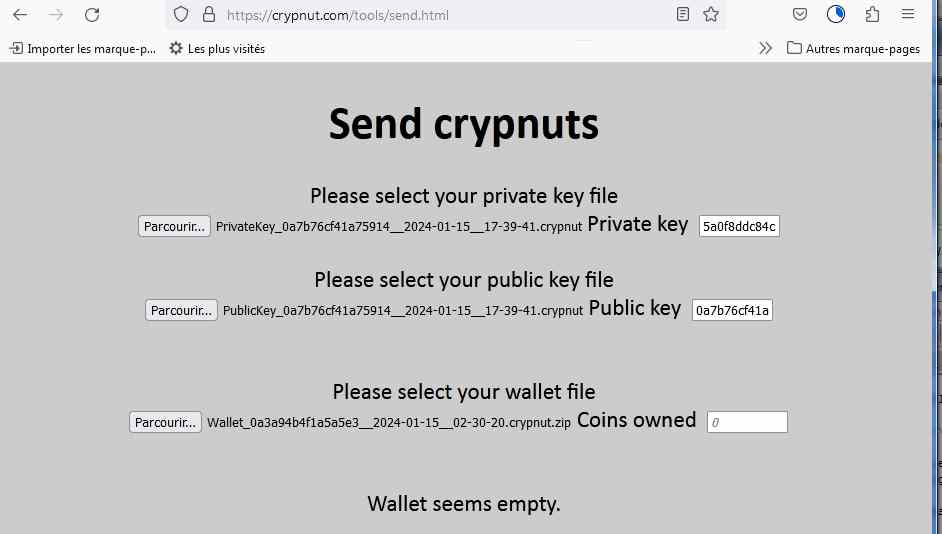
Click "Browse" to select your most recent (updated) wallet file. If the wallet does not belong to the selected public key (or if it is empty), then "Coins owned" shows 0.

If there are crypnuts in this wallet, then "Coins owned" shows the number. Note: you can check if all coins in this wallet really belong to you by submitting the wallet file to a Crypnut server as showned before.
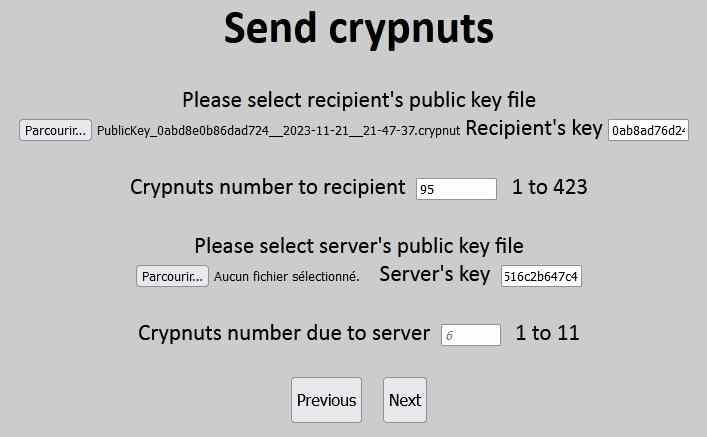
After you clicked "Next step", you have to select the recipient's public key file (or copy the key in the text field), write the number of crypnuts to send & select the server's public key file (or copy it from the server's main page to the text field). The number of crypnuts due to the server is calculated automatically.
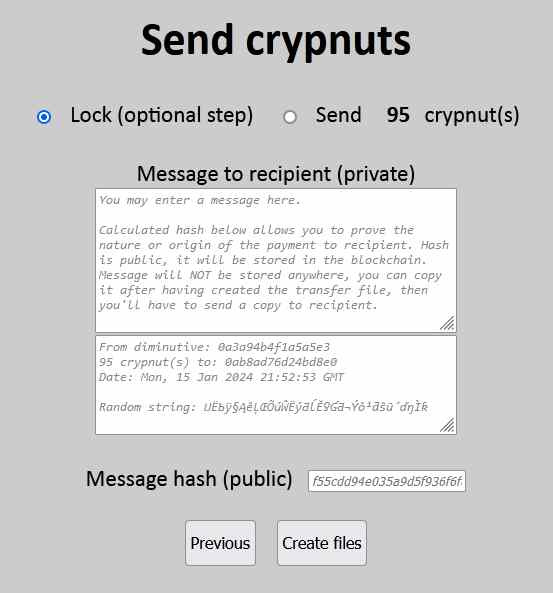
After you click "Next", you can choose to generate the transfer file only, or both transfer file & lock file, that is a way to pay in two steps (after a lock file is validated by the server, the sender cannot retrieve its crypnuts anymore and the receiver cannot use it until the transfer file is submitted). You can specify a message that can authentificate you as the sender to the receiver.
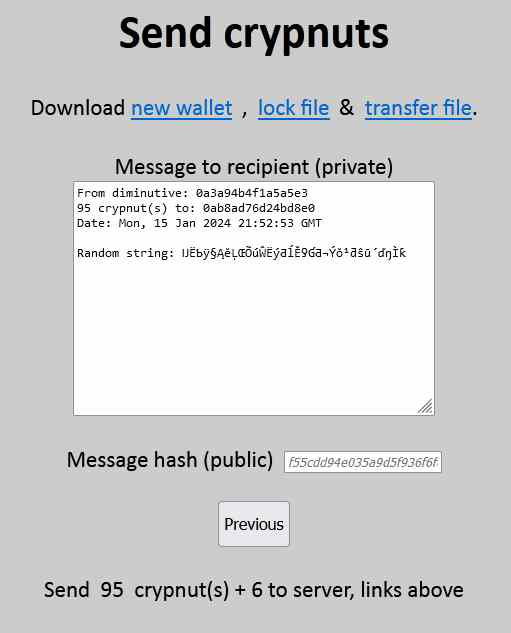
Finally, new files are generated. In this example, you can download your new updated wallet, a lock file & a transfer file.
Feel free to contact the original source code author on Twitter (X) or another network.
Back to crypnut server, or have a look at the FAQ.


